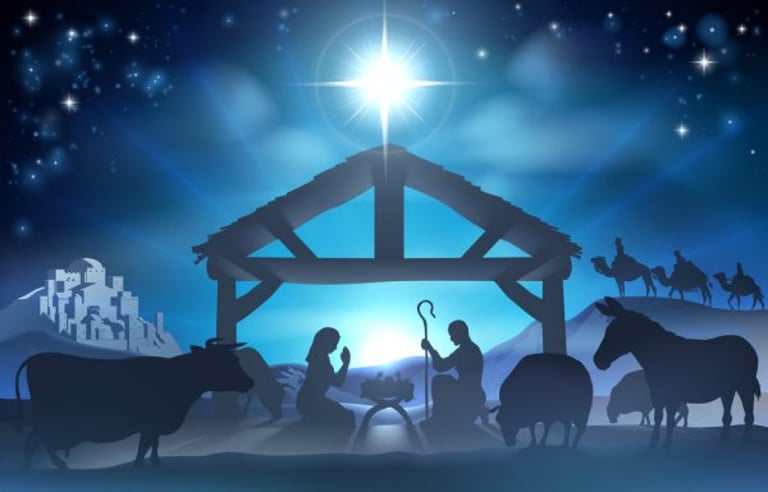
Best Nativity Scene Accessories: Bases, Risers, Backdrops and Scenery for Better Displays
Improve your Nativity display with the right stable, risers, terrain, backdrops and scenery. Learn how to match accessories to your figures and scale.
Grace Callahan
8/24/202613 min read


A beautiful Nativity display does not necessarily need more figures or a completely new set. Sometimes the biggest improvement comes from changing what surrounds the figures you already own.
A stable can give the scene a stronger setting. Moss or other terrain can turn a bare tabletop into a landscape. Risers can keep important figures from disappearing behind one another. Trees and other vertical scenery can add depth. A few carefully chosen details can make the entire display feel more intentional.
But there is one step to take before buying any of them:
Measure the Nativity you already own.
Nativity accessories are not universally sized. A stable designed around 7-inch figures may look enormous with a miniature collection and cramped with much larger figures. Trees, buildings, fences and other scenery can create the same problem.
The goal is not to collect as many accessories as possible. It is to identify what your current display is missing and solve that problem with scenery that fits.
If the bigger question is where or how to arrange the entire scene in your home, 20 Unique Ways to Display Your Nativity Scene at Home explores display locations and presentation ideas before you start adding accessories.
Quick Answer: What Makes the Biggest Difference to a Nativity Display?
Start by identifying what bothers you most about the current scene.
If the figures seem to float without a setting, a stable or creche may make the biggest difference.
If they look like figurines sitting on a shelf or table, moss, terrain or another ground treatment can visually connect the pieces.
If figures disappear behind one another, risers or subtle elevation can improve sightlines.
If the display looks flat, trees or other vertical scenery can create depth.
If the major pieces already look good but the scene seems slightly empty, a few small details such as fences, paths, hay, baskets or a well may be enough.
And if your Nativity already looks crowded, the best accessory may be no accessory at all. Repositioning or removing a few pieces can improve a display more than adding something new.
Before You Buy Anything: Measure Your Nativity
One of the easiest ways to make an otherwise attractive Nativity look awkward is to mix accessories that are noticeably out of scale.
Before shopping, measure five things:
the tallest standing figure
the approximate width of the Holy Family grouping
the width of the surface available for the complete display
the usable depth of that surface
the maximum height available above the display
Write the measurements down before you shop.
Take one photo of the complete display, too. A photo often makes proportion problems easier to spot than looking at the scene in person. You may immediately notice that the stable is too small, the background is empty or several figures are disappearing behind others.
This matters because a Nativity described as a 5-inch, 7-inch or 10-inch scale does not mean every figure is exactly that height. Figures are proportioned within the collection. Mary may be kneeling. Baby Jesus is obviously much smaller. Animals and children vary considerably.
Think of the stated size as a scale system, not a universal measurement for every piece.
That distinction becomes especially important when shopping for structures and scenery.
A stable must provide enough visual and physical space around the Holy Family. Trees need to look believable beside the people. A fence that works beautifully with a small collectible Nativity could look like a toy beside larger figures.
Do not rely on product photography to judge scale. Online photos can make a stable, tree or landscape piece appear much larger or smaller than it really is.
Compare the item's listed dimensions with the measurements of your own Nativity before ordering.
If you do not know the official scale or manufacturer of your figures, that's fine. Your measurements matter more than the label.
Start With the Biggest Problem, Not the Smallest Accessory
It is easy to start shopping for the fun pieces.
A miniature well looks interesting. So does a little campfire. A fence could be charming. Perhaps the shepherds need another animal.
But those details usually will not fix a display whose basic structure is wrong.
Build the scene in order of visual impact:
Setting → ground → elevation → vertical depth → finishing details
Suppose your Holy Family and Wise Men are arranged on a bare console table with no background. Adding three tiny accessories probably will not transform it.
A stable might.
If the stable already looks good but all of the figures seem to stand in one flat row, elevation may matter more.
If the figures are arranged well but the tabletop keeps showing between them, terrain may solve the problem.
Before buying anything, ask:
What single change would improve this display the most?
Start there.
If you're still working out the overall display rather than one specific accessory problem, Complete Guide to Creating and Displaying The Best Nativity takes a broader look at building the complete scene.


Upgrade the Setting With a Stable or Creche
A stable or creche is often the largest visual element in a traditional Nativity scene, which means changing it can dramatically alter the entire display.
A separate stable makes particular sense when:
your figures did not originally include one
the original stable was lost or damaged
the existing structure is too small for the figures
you inherited or collected figures individually
you want a stronger visual background
the figures currently look disconnected from one another
If the missing piece is the setting itself, this is one area where buying a purpose-built Nativity accessory can make sense.
One option worth considering is the Three Kings Gifts Christmas Nativity Lighted Stable.
The important feature for our purposes is not simply that the stable is lighted. Different size variations are available for different Nativity scales, making it especially important to choose according to the figures you already own.
Do not choose a stable because the product photograph looks perfect. Choose the version whose dimensions and intended scale make sense with the figures you already own.
A stable should frame the Holy Family without swallowing it. Joseph should not appear to be touching the roof, but the structure should not be so enormous that the figures look lost inside it either.
Also consider the footprint. A stable may fit your figures beautifully but still be too deep for a mantel or narrow shelf.
Before ordering, compare the stable's current listed dimensions with the width, depth and figure-height measurements you took earlier.


What About a Backdrop Instead?
Not every Nativity needs a three-dimensional stable.
A small architectural backdrop, stable facade or Bethlehem-inspired background can work particularly well when display depth is limited.
A backdrop can visually contain the scene without occupying as much tabletop space.
For this article, however, we are talking about tabletop Nativity backgrounds and scenery. Large photographic backdrops designed for church stages, pageants and living Nativities solve a very different problem.
If your Nativity already has an attractive stable, don't add another background simply because you can. The stable may already be doing that job.


Cover the Bare Surface With Terrain and Landscape
One of the simplest improvements to a Nativity display is also one of the easiest to overlook.
Look underneath the figures.
If you see polished furniture, a plastic shelf, a plain tablecloth or another household surface, the individual pieces may never quite feel like one scene.
Terrain visually connects them.
That does not mean you need to construct an elaborate miniature Bethlehem. Even a restrained ground treatment can change the appearance substantially.
Depending on the style of your Nativity, possibilities include:
moss
desert-style terrain
stone or gravel
natural-looking fabric
hay
paths
small areas of greenery
textured landscape material
For a traditional green landscape, the Fontanini Natural Moss Landscape for 5-Inch Scale figures is a useful example of purpose-built Nativity terrain.
Its greatest value is showing what a landscape layer can accomplish: instead of placing individual figures directly onto furniture, you create a visual foundation underneath the entire scene.
But notice the scale designation again.
A landscape intended around a 5-inch collection should not automatically be assumed to suit a much larger Nativity. Check its current dimensions and consider how much of your display surface it needs to cover.
You also do not have to use a purpose-built Nativity landscape. Appropriate craft and miniature-display materials can accomplish the same goal if they look right with your figures and can be used safely around the display.
Readers who would rather build more of the setting themselves can also use Craft Your Own Traditional Nativity Scene: A Complete Guide for a more hands-on approach.
For the Nativity itself, keep the ground treatment subordinate to the figures. Terrain should make the scene feel connected, not become the first thing you notice.


Use Elevation to Make Every Figure Visible
Many Nativity displays have a problem that only becomes obvious after all the figures are in place:
You cannot see them.
A shepherd disappears behind a Wise Man. An animal is hidden behind another animal. Figures in the back become little more than heads.
The natural response is often to spread everything farther apart.
That works if you have unlimited space. Most people do not.
Elevation provides another option.
By raising selected figures or scenery toward the back of the display, you can create foreground, middle ground and background without requiring a much wider surface.
A product does not have to be labeled as a Nativity accessory to accomplish this.
If crowded sightlines are your main problem, a simple tiered display riser may improve the scene more than adding another decorative accessory.
The Vexcoty 2-Set Wooden Tiered Risers are a good example. These are general-purpose wooden display risers rather than Nativity-specific scenery, but the concept translates well to a tabletop display.
The wood also makes them easier to visually integrate into many traditional Nativity arrangements than an obviously modern display stand might be.
Before choosing any riser, check:
overall width and depth
stability
height of each level
whether your figures sit securely
whether the riser will remain visible
whether the raised figures still look proportionate to the rest of the scene
You do not need to place every figure on a different level.
In fact, don't.
Raise the background, not everything.
The Holy Family can remain the visual anchor while selected figures or scenery farther back receive just enough elevation to remain visible.
If the riser itself looks distracting, terrain, fabric or other scenery may help conceal its edges. Do not cover a stand in a way that makes the figures unstable.
Elevation should make the arrangement easier to see without making the Nativity look like stadium seating.


Add Height and Depth With Trees and Vertical Scenery
Once the ground and figure arrangement work, look at the scene from normal viewing distance.
Does everything occupy roughly the same visual band?
That can make even a large collection feel flat.
Vertical scenery creates another dimension.
Trees, walls, architectural pieces and other taller elements can:
frame the central scene
fill awkward vertical space
create a background
separate groups of figures
lead the viewer's eye toward the Holy Family
make a deep tabletop arrangement feel intentional
The Fontanini Palm Tree 3-Piece Set for the 5-Inch Collection demonstrates this particularly well.
A group of trees can create height without becoming another building competing with the stable.
But once again, match the accessory to your existing Nativity.
These trees are associated with a 5-inch collection. If you own substantially larger figures, treat them as an example of the kind of vertical scenery you might use rather than assuming this particular set will look proportionate.
The opposite problem exists too. Oversized scenery can dwarf small figures.
You are looking for believable visual relationships, not necessarily perfect mathematical scale.


Add Small Details Only After the Main Scene Works
This is where scene building becomes fun—and where it can get out of control.
Once the stable, terrain, figure placement and major scenery are established, you can consider smaller details such as:
fences
wells
campfires
baskets
hay
walls
paths
carts
additional animals
small buildings
pottery or other miniature objects
You do not need one of everything.
Instead, make each accessory earn its space.
A fence might define where the animals belong.
A path could visually connect the Magi to the central scene.
A small campfire might establish a secondary shepherd area.
A well or basket might fill an awkward empty space without competing with the Holy Family.
Ask whether the accessory does at least one of four things:
Does it frame the scene?
Does it establish depth?
Does it fill a genuinely awkward space?
Does it help tell the story?
If the answer is no, you probably don't need it.
That approach also gives you freedom to build the scene gradually. You do not have to finish everything in one order or one Christmas season.
How to Make Mixed Accessories Look Like One Nativity Scene
There is no rule saying every accessory must come from the same manufacturer.
In fact, mixing pieces can create a more interesting display.
The challenge is making them look intentional together.
Start With Scale
Scale remains the most important consideration.
A rustic fence from one company may work perfectly beside figures from another. A beautifully made well that reaches Mary's shoulder probably will not.
Use your measurements and your eyes.
Watch the Color Palette
A brightly colored glossy accessory can stand out awkwardly among muted, hand-painted figures.
That does not mean every color must match. Look instead for pieces that feel as though they belong in the same visual world.
Consider Materials and Finish
Wood, resin, moss, stone-like materials and natural textures can often coexist easily.
A very modern-looking plastic accessory may require more careful placement in a traditional scene.
Repeat Elements
Repeating a texture or color in more than one location can make unrelated accessories feel connected.
For example, using the same terrain beneath the stable and around a raised background area can visually unite both parts of the scene.
Leave Empty Space
Empty space is part of the composition.
You do not need to fill every gap between figures.
A little open space around the Holy Family can actually strengthen the focal point.
The products discussed in this guide solve different display problems. The stable, moss landscape, wooden risers and palm trees are examples of useful solutions, not a coordinated set that everyone should purchase together.
Choose what fits your figures and your display.
Common Nativity Scene-Building Mistakes
One of the easiest ways to improve a Nativity display is to avoid adding something that creates a new problem.
Buying Before Measuring
A stable, tree or riser can look perfectly proportioned in a product photo and completely wrong beside your figures. Measure the display first and compare those measurements with the actual dimensions of anything you are considering.
Trying to Fix Every Problem With More Accessories
If the figures are difficult to see, another basket or animal will not solve the problem. Fix the underlying issue first. That may mean adding elevation, changing the arrangement or removing pieces rather than buying more scenery.
Using Too Many Different Scales
Accessories do not have to come from the same manufacturer, but they should look believable together. A fence that reaches a standing figure's waist or a tree barely taller than Joseph can make the scale mismatch obvious.
Making Every Part of the Scene Equally Important
The Holy Family should normally remain the visual center. Large scenery, bright accessories and excessive detail can compete with that focal point instead of supporting it.
Filling Every Empty Space
Open space is not necessarily a problem. Leaving breathing room around important figures can make the entire display easier to understand and more visually balanced.
Adding Finishing Details Too Early
Start with the major figures, setting, ground treatment and elevation. Small accessories become much easier to choose once the basic composition already works.
The simplest rule is the same one that guides the rest of this article: solve the biggest visual problem first, then stop when the display feels complete.
Build Your Nativity Display in Layers
If you are starting over or reorganizing an existing display, build it gradually rather than placing everything at once.
Layer 1: Position the Major Figures
Start with the Holy Family and other important figures.
If you're unsure how to arrange them, Perfecting Your Nativity Scene: Common Figure Setups can help you establish the basic composition before adding scenery.
Layer 2: Establish the Setting
Place the stable, creche or background.
Check that it frames rather than overwhelms the figures.
Layer 3: Add the Ground
Introduce moss, terrain or another surface treatment.
This visually connects the setting and figures.
Layer 4: Create Elevation
Raise only the pieces that need better visibility or depth.
Step back and look at the display from where people will normally see it.
Layer 5: Add Vertical Scenery
Introduce trees or other taller pieces where they improve framing and depth.
Layer 6: Add Finishing Details
Now consider fences, paths, hay, small structures and other details.
Stop before the scene becomes cluttered.
Layer 7: Add Lighting
Lighting is its own design decision.
A well-positioned warm light can emphasize the Holy Family and create depth, while too much brightness can flatten the scene or draw attention away from the figures.
For now, get the physical arrangement right first. Choosing spotlights, warm LEDs, battery lights, timers and other illumination options deserves its own discussion.
For now, get the physical arrangement right first. When you are ready to illuminate the finished display, How to Light an Indoor Nativity Scene: Placement, LEDs, Spotlights and Display Tips explains how to use warm lights, spotlights, battery-powered options and other lighting choices without overwhelming the Nativity itself.
Which Nativity Scene Upgrade Should You Buy First?
If you are still deciding where to spend your money, return to the original problem.
If your figures lack a convincing setting, start with a stable or creche.
If they look like figurines sitting on furniture, start with terrain or landscape.
If important figures disappear behind others, start with elevation or risers.
If the scene looks flat, start with trees or other vertical scenery.
If the major composition already works but feels unfinished, add one or two small details.
If the display already looks balanced and complete, don't buy anything merely because another accessory exists.
The best Nativity display is not necessarily the one with the most pieces. It is the one where the pieces work together.
Final Thoughts
Improving a Nativity scene does not have to mean replacing the set you already own.
A better stable can strengthen the setting. Terrain can connect the figures visually. Risers can improve sightlines. Trees and other vertical elements can create depth. Small accessories can add character when they serve a purpose.
But the most important step comes before any of those purchases:
Measure what you already own.
Then solve the biggest visual problem first.
Build slowly, match accessories to the scale and style of your figures, and stop adding pieces when the scene feels complete.
The goal is not to create the largest Nativity.
It is to create a display where the setting supports the story rather than distracting from it.
Frequently Asked Questions About Nativity Scene Accessories
Continue Reading
20 Unique Ways to Display Your Nativity Scene at Home
Explore different places and approaches for displaying a Nativity throughout your home, including ideas that can help you decide what kind of setting and accessories make sense for your space.
Perfecting Your Nativity Scene: Common Figure Setups
Once you've chosen the display location, learn how to position the Holy Family, shepherds, Magi, animals and other figures before adding scenery around them.
Complete Guide to Creating and Displaying The Best Nativity
Take a broader look at planning, creating and presenting a complete Nativity display beyond the individual accessory decisions covered here.
Craft Your Own Traditional Nativity Scene: A Complete Guide
Prefer a more hands-on approach? Explore ways to create more of the Nativity setting yourself instead of relying entirely on purchased scenery.
“As an affiliate marketer, I earn from qualifying purchases with no added cost to you.”
© 2024. All rights reserved.