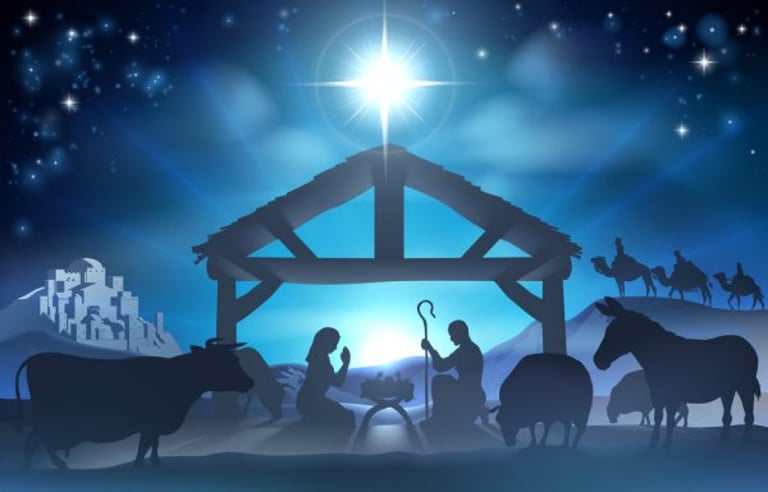
How to Light an Indoor Nativity Scene: Placement, LEDs, Spotlights and Display Tips
Learn how to light an indoor Nativity scene using warm LEDs, angled lighting, backlighting, fairy lights and flameless candles for a safe, beautiful display.
Grace Callahan
8/24/202617 min read


Lighting can completely change the appearance of a Nativity scene without changing a single figure.
Aim a light directly at the front and every figure becomes easier to see, but the scene may lose some depth. Move that same light to one side and folds in clothing, faces and stable walls begin creating shadows. Put a soft light behind the stable and the entire display can feel more atmospheric.
The difference is not always the light itself.
It is where you put it.
That is why the best place to begin is not by shopping for Nativity lights. Start by deciding what you want the lighting to accomplish.
Do you want the Holy Family to stand out? Do you want the stable to have a soft glow? Are important figures disappearing into shadow? Would an illuminated Star of Bethlehem add a focal accent?
Once you know the effect you want, choosing the right light becomes much easier.
And for an indoor Nativity, one safety rule comes first:
Do not use open-flame candles, tea lights or other flames in or around an indoor Nativity display. Battery-operated LEDs and flameless candles can create similar lighting effects without placing an open flame near moss, hay, fabric, wood, paper scenery or other combustible decorations.
Table of Contents
Quick Answer: What Is the Best Way to Light a Nativity Scene?
For many traditional indoor Nativities, a good starting point is soft warm-white LED lighting positioned slightly above and to one side of the Holy Family.
That is only a starting point.
Different positions create different effects:
Front lighting makes figures easier to see.
Angled front lighting combines visibility with depth.
Side lighting emphasizes texture and shadows.
Backlighting creates atmosphere and silhouettes.
Concealed micro LEDs can add a soft glow inside or behind the stable.
Flameless LED tea lights can create a candle-like flicker without an open flame.
A lighted Star of Bethlehem can become an accent that draws the eye toward the central scene.
You do not need all of these.
In fact, lighting everything equally can make a Nativity less interesting.
Light intentionally rather than simply making everything brighter.
Before You Buy a Light: Try the Flashlight Test
You can learn a surprising amount about your Nativity before spending anything.
Wait until the room is approximately as dark as it normally will be when you want the Nativity illuminated. Turn off or dim nearby lamps.
Then grab a flashlight or use the light on your phone.
Start directly in front of the Nativity and aim the light toward the Holy Family.
Look at the faces and clothing. Notice the shadows behind the figures.
Now move the light to the left and aim it toward the scene from an angle.
Try the right side.
Move it farther to the side.
Hold it above the scene and slightly forward.
Finally, try placing the light behind or partially behind the stable.
Do not just watch the light while you're moving it. Stop at each position for a moment.
Better yet, take a photo from your normal viewing position each time.
Photos often reveal things you miss while concentrating on the flashlight itself. You may discover an unattractive shadow across Mary's face, glare on a glossy figure or a dramatic stable silhouette that you hadn't noticed before.
Most importantly, you may discover that your Nativity doesn't need more light.
It needs light from a better direction.
How Lighting Placement Changes Your Nativity
There is no universally correct position for a Nativity light.
The shape of the stable, height of the figures, surrounding room lighting and even the finish on the figures all affect the result.
Understanding what the basic lighting positions do, however, gives you a much better place to start.
Front Lighting: Clear but Sometimes Flat
Positioning a light directly in front of a Nativity is the simplest approach.
It makes faces visible. Dark figures become easier to see. Small details become more obvious.
That can be exactly what a display needs.
The disadvantage is that direct frontal lighting tends to reduce the shadows that help three-dimensional figures look three-dimensional.
Robes can appear flatter. Facial contours become less pronounced. Stable walls and scenery may lose some of their texture.
If direct front lighting looks too flat, don't immediately buy another light.
Move the existing light slightly to one side.
Even a modest change in angle can create enough shadow to restore depth.
Angled Front Lighting: A Good Place to Start
If you're unsure where to place a light, try positioning it roughly 30 to 45 degrees to one side of the Nativity and somewhat above the figures.
Treat that as an experiment, not a mathematical requirement.
This position often gives you the advantages of front and side lighting at the same time.
Faces remain visible, but noses, robes, animals and scenery create gentle shadows. Texture becomes more obvious. The stable gains depth.
The fixture may also be easier to hide because it no longer has to sit directly in front of the display.
Move the light around within that general area.
A few inches can make a surprising difference.
If the shadows become harsh, move the light farther away or change the angle. If the opposite side of the display becomes too dark, reduce the angle or consider a very subtle secondary light.
The goal is not perfect symmetry.
A little shadow is useful.
Side Lighting: Texture and Drama
Move the light farther toward one side and the shadows become stronger.
This can look particularly attractive with sculpted robes, textured resin, stone-like scenery, rough wooden stables, walls, architectural pieces and detailed animal figures.
Side lighting allows those textures to cast visible shadows.
But it is easier to overdo.
One side of a face may become beautifully modeled while the other disappears. A figure standing in front of another may cast a distracting shadow across it.
If you like the dimensional effect but the shadows are too strong, soften the arrangement rather than abandoning it.
Move the light farther away, shift it slightly toward the front or add a small amount of gentle fill light from another direction.
Backlighting: Atmosphere Instead of Detail
Backlighting does something very different.
Instead of primarily illuminating the fronts of the figures, the light comes from behind them or behind the stable.
That can outline figures, separate them from a dark background, create a glow through stable openings, illuminate translucent scenery, create silhouettes and make the display appear deeper.
It can be beautiful.
It can also make it difficult to see anyone's face.
If the Holy Family turns into three dark silhouettes in front of a glowing stable, the backlight is doing its job—but it may be doing too much of it.
Try combining a subtle backlight with softer angled illumination from the front.
The backlight creates atmosphere while the front light restores enough detail to see the figures.
Lighting From Above
Light coming from above can feel natural because we are accustomed to illumination coming from the sky or ceiling.
But directly overhead lighting has a weakness.
Brows, head coverings and facial features can cast deep downward shadows.
If the faces become dark, move the source above and slightly toward the front rather than directly overhead.
Again, a small adjustment can matter more than a brighter bulb.
Uplighting From Below
Lighting upward from beneath or below the figures can create dramatic shadows.
That can sometimes work for architecture, a backdrop or a special accent.
For faces, however, strong uplighting often looks theatrical or unnatural.
Use it sparingly.
The objective is a peaceful, dimensional Nativity—not a miniature theme park.
Warm White, White or Cool White?
After deciding where the light should go, consider its color.
The familiar terms warm white, white and cool white describe noticeably different appearances.
Warm White
Warm white is generally the safest starting point for a traditional Nativity.
It tends to complement earth-tone figures, wood, moss, hay, stone-like scenery, traditional painted resin and rustic stables.
The warmer appearance can resemble the atmosphere people associate with candlelight without requiring an actual flame.
That does not mean every Nativity should use warm white.
It means traditional scenes are a good place to start experimenting with it.
Neutral or Standard White
A more neutral white can make colors appear clearer and less golden.
That may be useful when the painted colors of the figures are important or when the surrounding room already has relatively neutral lighting.
Cool White
Cooler white can work particularly well with certain modern displays.
Consider experimenting with it for white porcelain, silver, crystal, glass, minimalist Nativities and cool-toned contemporary displays.
On a rustic wooden stable surrounded by moss and earth-tone figures, however, the same cool light may feel harsher than you want.
Match the light to the Nativity, not to a generic Christmas-light recommendation.
And remember that the room matters.
A warm Nativity light surrounded by very cool room lighting can look different from that same light in an otherwise dark room.
Test the final arrangement under the conditions in which you will actually use it.


Use Small Lights to Put Attention Where You Want It
Large lamps are not always easy to incorporate into a tabletop Nativity.
Sometimes a tiny light is more useful precisely because it can disappear.
The SUZEYAR 10-Piece Miniature LED Lights in Warm White are an interesting example. Lights designed for dollhouses, crafts and other miniature scenes can also make sense around a Nativity because their physical size allows them to fit where conventional fixtures would be distracting.
They can potentially be positioned behind a stable post, behind scenery, near the Holy Family, behind a small wall, among appropriately arranged terrain or near an architectural element.
These are miniature lights rather than conventional adjustable spotlights, so don't assume they will behave like a full-size directional fixture.
Experiment.
The flashlight test has already shown you approximately where illumination works. Now you can try positioning a miniature light near that location and see whether it produces a similar effect.
If one location doesn't work, move it.
The advantage of miniature lighting is flexibility, not the need to commit immediately to one permanent position.
And remember the larger principle:
You want people to notice what the light illuminates—not the light itself.


Create a Soft Glow With Micro Fairy Lights
Sometimes you don't want a defined focal light.
You want the stable or background to glow.
This is where a short strand of micro fairy lights can be useful.
The Brightown 7-Foot 20-LED Fairy Lights are a good example because the strand is short enough to be practical around many tabletop displays.
A Nativity usually does not need 30 or 60 feet of lights.
A short thin-wire strand is easier to conceal and gives you enough flexibility to experiment with locations such as inside or behind the stable, behind architectural scenery, along a background, around a star area or behind terrain and other scenery where appropriate.
For many traditional Nativities, I would start by considering the warm-white variation.
If your Nativity is white, silver, crystal or contemporary, another white tone may suit it better.
The goal is not to wrap the stable like a Christmas tree.
Instead, try hiding most of the strand so that you see a soft glow rather than a row of obvious bulbs.
Start with less.
You can always expose or reposition another light if the scene needs it.


Create a Candlelit Glow Without an Open Flame
A traditional Nativity can look especially attractive with the warm, gentle flicker people associate with candlelight.
But you do not need—and should not use—a real candle around the display to create that effect.
Homemory 12-Piece Flickering Flameless LED Tea Lights provide another option. Instead of directly illuminating a particular figure or spreading light throughout the stable, these small battery-operated lights are intended to imitate the warm flicker of a candle.
That makes flameless tea lights particularly useful when your goal is atmosphere rather than direct illumination.
Try positioning one partially concealed beside the stable, behind a wall or piece of scenery, behind or inside an appropriate lantern-style accessory, or near the edge of the display where its glow can reach the scene without the plastic candle becoming visually prominent.
Do not assume that more is better.
A single concealed tea light may create a more convincing candlelit effect than surrounding a small Nativity with several flickering lights.
And use the same principle that applies to the rest of the lighting:
Hide the light, not the effect.
If the first thing you notice is a plastic tea light sitting beside a shepherd, move it.
Flameless candles eliminate the open flame, but they do not eliminate every safety consideration. Battery type and battery-compartment security still matter, particularly where young children can access the display.
Layer the Lighting Instead of Making Everything Brighter
A useful way to think about Nativity lighting is in layers.
Layer 1: Focal Light
This is the light that directs attention toward the most important part of the scene.
Usually that is the Holy Family.
A small warm light positioned from the front or at an angle may be all you need.
Layer 2: Ambient Light
Ambient lighting creates atmosphere around the focal point.
A soft glow inside the stable or subtle light behind scenery can make the display appear deeper without competing with the figures.
Micro fairy lights can work well here.
Layer 3: Accent Light
Accent lighting highlights one specific secondary element.
The Star of Bethlehem is the obvious example.
But here is the important part:
You do not need all three layers.
Some Nativities look beautiful with one carefully positioned light.
Others benefit from a focal light plus a subtle stable glow.
Add the third layer only when it improves the scene.
If every tree, wall, figure, star and piece of scenery is equally bright, none of them is directing the eye anywhere.
Using a Lighted Star of Bethlehem
A lighted Star of Bethlehem can make a meaningful difference even though it does not illuminate the scene in the same way as a spotlight.
Its job is different.
The star is an accent and visual guide.
Positioned above or behind the stable, it can naturally draw the eye toward the Holy Family.
Your Nativity may already include an illuminated star.
If it has an unlit star, you may be able to place soft illumination behind or near it, depending on its design and materials.
You can also use a separate lighted star if you find one whose scale and style suit the existing display.
Do not force it.
A giant Christmas-tree topper hovering over small tabletop figures will probably create more distraction than atmosphere.
Likewise, a highly ornate illuminated star may look out of place with a simple rustic Nativity.
And brightness matters.
The star should lead the eye toward the Nativity, not become the brightest object in the room.
If your eye goes immediately to the star and stays there, reduce its brightness if possible, move it or increase the subtle illumination around the central figures.
The star should support the focal point rather than replace it.
Hide the Light, Not the Effect
Once you find a lighting arrangement you like, look at the equipment.
Can you see the fixture?
What about the wire?
Is a battery box sitting beside a shepherd?
The best lighting often becomes more convincing when the source disappears.
A stable post may hide a tiny light.
A wall can conceal a wire.
A tree or piece of scenery may block the normal viewing angle toward a fixture.
Terrain can sometimes disguise a support or cable without covering electrical components.
This is also where the physical scene matters. Best Nativity Scene Accessories: Bases, Risers, Backdrops and Scenery for Better Displays explores how terrain, elevation, trees and other scenery can improve the display itself—and some of those same elements can help conceal lighting hardware.
But concealment should never make the display less safe.
Do not balance a figure precariously because you want to hide a wire behind it.
Do not bury a battery compartment where you cannot reach it.
Do not cover electrical components contrary to the manufacturer's instructions.
Hide the light visually while keeping the equipment safe and accessible.
Avoid Glare and Harsh Shadows
Adding more light is rarely the best solution to glare.
Change the position first.
If you see a bright hotspot on a glossy figure, move the light to one side, raise or lower it, move it farther away or reduce its intensity if possible.
Watch nearby glass too.
A Nativity displayed inside a glass cabinet, beneath framed artwork or near a mirror can produce reflections you did not expect.
The phone-camera test is useful again here.
Take a photo from the normal viewing position.
A bright reflection or hotspot that your eyes have started ignoring may become immediately obvious in the photograph.
Harsh shadows can often be handled the same way.
Move the light.
Change its angle.
Increase the distance.
If necessary, use a second softer source rather than making the first light brighter.
The goal is not to eliminate every shadow.
Shadows are one of the things that give a three-dimensional Nativity depth.
Timers, Batteries and Everyday Convenience
A lighting arrangement can look wonderful and still become annoying if you must take half the Nativity apart every evening to turn it off.
Think about daily use before hiding everything.
If your lights include a built-in timer, it can be convenient for a display that operates at roughly the same time every day.
Battery-powered lighting can also make placement easier when the Nativity is far from an outlet.
But battery boxes need to remain accessible.
Do not bury one beneath scenery that has to be removed every time the batteries need attention.
Before storing the Nativity after Christmas, check the manufacturer's instructions and remove replaceable batteries when appropriate for long-term storage. Inspect the battery compartments when you unpack the lights the following season and don't use equipment showing leakage, corrosion or damage.
Convenience matters because a lighting system that is frustrating to operate probably won't be used for long.
Nativity Lighting Safety
Lighting should make the Nativity more enjoyable, not introduce unnecessary hazards.
Never Use Open Flames
Do not place real candles, tea lights, oil lamps or other open flames in or around an indoor Nativity.
That becomes especially important when a display contains materials such as moss, hay, fabric, wood, paper or cardboard scenery and artificial greenery.
Use electric LED alternatives instead.
The visual effect of candlelight can be approximated without placing an actual flame beside combustible scenery.
Keep Wiring Safe
Do not route wires where people can trip over them.
Do not pinch or crush wiring underneath heavy objects.
Do not use lighting with damaged insulation or exposed wiring.
Keep plugs, connections and electrical components accessible and use products according to their manufacturer's instructions.
Treat Button and Coin Batteries Seriously
Some miniature lights and flameless candles use very small batteries.
That requires extra caution in homes where young children may have access to the Nativity.
Button and coin batteries can cause severe internal injuries if swallowed.
Small lights deserve the same careful product selection as larger electrical decorations.
Flameless means no open flame. It does not mean no safety considerations.
Common Nativity Lighting Mistakes
Making Everything Equally Bright
A Nativity needs a focal point. If the Holy Family, shepherds, animals, stable, trees and background are all illuminated at the same intensity, the viewer has no obvious place to look first. Start with the central scene and add other light only when it improves the composition.
Choosing the Light Before Testing the Position
A brighter or more expensive light will not necessarily fix poor placement. Use the flashlight test first. Moving a light several inches or changing its angle can make a larger difference than buying another fixture.
Using Light That Is Too Cool for the Display
Cool-white LEDs can work beautifully with porcelain, crystal and contemporary Nativities, but they may look harsh beside rustic wood, moss, hay and traditional earth-tone figures. Match the color of the light to the scene.
Leaving the Light Source in Plain View
Visible bulbs, battery boxes and wires can quickly break the illusion of a carefully arranged Nativity. Conceal the equipment where practical while keeping switches, batteries and electrical components safe and accessible.
Eliminating Every Shadow
Shadows are not automatically a lighting problem. They give robes, faces, animals, stable walls and scenery dimension. The goal is to control distracting shadows without flattening the entire display.
Adding Too Many Lighting Effects
A spotlight, glowing stable, flickering candle effect and illuminated star can all work individually. That does not mean every Nativity needs all four. Add one effect at a time and stop when the display feels complete.
Using Real Candles for Atmosphere
Do not use an open flame around an indoor Nativity. Flameless LEDs can provide a candle-like glow without placing fire beside moss, hay, fabric, wood, paper or other combustible scenery.
The simplest rule is to light the Nativity in the same order you would decorate it: establish the focal point first, add atmosphere only where it helps, and stop before the lighting becomes the subject of the display.
A Simple Nativity Lighting Setup to Try First
If all of these options sound complicated, they do not have to be.
Start with this process.
Step 1: Finish the Physical Display
Arrange the figures, stable and major scenery before solving the lighting.
If you're still working on the composition, Perfecting Your Nativity Scene: Common Figure Setups can help you establish the figure arrangement first.
Step 2: Darken the Room
Recreate the conditions in which you normally want the Nativity illuminated.
Step 3: Perform the Flashlight Test
Try the light from the front, both angled sides, the side, above and behind.
Take photos.
Step 4: Start With the Holy Family
Try one soft light from slightly above and to one side.
Adjust until faces are visible and the figures retain some shadow and dimension.
Step 5: Look at the Whole Scene
Do not stare only at the brightest area.
Look at shepherds, Magi, animals, stable walls and background scenery.
Are important pieces disappearing?
Are any shadows distracting?
Step 6: Add Ambient Light Only if Needed
If the stable or background still looks empty or dark, experiment with a small amount of concealed ambient lighting.
Step 7: Consider Candlelight or the Star
If you want a warmer flickering atmosphere, test a concealed flameless LED tea light.
If the scene includes a Star of Bethlehem, decide whether illuminating it improves the composition.
Neither is mandatory.
Step 8: Hide the Equipment
Conceal fixtures and wiring where practical while keeping batteries and controls accessible.
Step 9: Take One More Photo
Compare it with the photographs from your original flashlight test.
Did the final lighting actually improve the display?
Step 10: Stop
This may be the most overlooked step.
Once the Holy Family is visible, the scene has depth and the lighting creates the atmosphere you want, you are finished.
Another strand of lights does not automatically make it better.
Frequently Asked Questions About Lighting a Nativity Scene
What color light is best for a Nativity scene?
Warm-white LED lighting is a good starting point for traditional Nativities with wood, earth tones, moss, hay and painted figures. Neutral or cooler white can work well with porcelain, crystal, silver or contemporary sets. Match the lighting to the appearance of your particular Nativity.
Where should I put a light on a Nativity scene?
Try starting slightly above and about 30 to 45 degrees to one side of the Holy Family. This can provide visible faces while preserving enough shadow for depth. Use a flashlight first because the best angle depends on your figures, stable and room.
Should a Nativity scene be backlit?
It can be. Backlighting can create attractive silhouettes, illuminate stable openings and separate figures from the background. If faces become too dark, combine subtle backlighting with softer front or angled illumination.
How do you hide lights in a Nativity scene?
Small fixtures and thin wires can sometimes be concealed behind stable posts, walls, trees, terrain, risers or other scenery. Keep battery compartments, switches and electrical connections accessible and never sacrifice figure stability simply to hide the equipment.
Can I put fairy lights in a Nativity stable?
Short LED micro-light strands can create a soft stable glow when used according to the manufacturer's instructions. Hide most of the wire and bulbs when possible so the viewer notices the illumination rather than the strand itself.
Can I use candles around a Nativity scene?
Do not use open-flame candles, tea lights or oil lamps in or around a Nativity display. Moss, hay, fabric, wood, paper scenery and artificial greenery can all add combustible materials near the scene. Use LED or flameless alternatives instead.
Are flameless candles good for Nativity scenes?
They can be useful when you want a flickering candle-like atmosphere rather than direct figure illumination. Partially concealing a flameless tea light can make the glow more convincing. Remember that flameless candles may still contain small batteries that require careful handling around children.
Should I illuminate the Star of Bethlehem?
You can. A lighted or softly illuminated star can act as an accent that draws the eye toward the Holy Family. Keep its scale, style and brightness appropriate to the Nativity so the star supports rather than overwhelms the central scene.
Do I need several lights for a Nativity?
No. Many displays need only one carefully positioned light. Add ambient or accent lighting only if it improves the scene. More lights are not automatically better.
Final Thoughts
Good Nativity lighting is not about maximum brightness.
It is about directing attention.
Start by arranging the physical scene. Then use the flashlight test to see how front, angled, side, overhead and backlighting change the figures.
Choose the lighting effect before choosing the product.
For many traditional Nativities, soft warm-white LEDs are a useful starting point, but the figures and setting should determine the final choice.
Light the focal point first.
Add atmosphere only when the scene needs it.
Use an illuminated star as an accent rather than a competing focal point.
If you want candlelight, create the effect with flameless LEDs rather than an open flame.
Hide the equipment without compromising safety.
And leave some shadows.
A Nativity does not need every detail illuminated equally to be beautiful. Often, the contrast between light and shadow is exactly what gives the scene its depth.
Continue Reading
Best Nativity Scene Accessories: Bases, Risers, Backdrops and Scenery for Better Displays
Build the physical setting first with appropriately scaled terrain, elevation, scenery and backgrounds, then use lighting to emphasize the parts of the display that matter most.
20 Unique Ways to Display Your Nativity Scene at Home
Explore different locations and presentation approaches for your Nativity before deciding how its surroundings and room lighting affect the display.
Perfecting Your Nativity Scene: Common Figure Setups
Arrange the Holy Family, shepherds, Magi, animals and other figures into a balanced composition before deciding where light and shadow should fall.
Complete Guide to Creating and Displaying The Best Nativity
Take a broader look at creating and presenting the complete Nativity scene, from the basic display through the finishing details.
“As an affiliate marketer, I earn from qualifying purchases with no added cost to you.”
© 2024. All rights reserved.